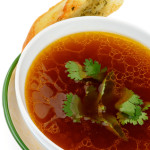
Crockpot Bone Broth Recipe
Few foods promise the nutrients and minerals that bone broth offers, and this soup not only offers benefits to your health but it also tastes pretty good, and anyone can make it.
- Prep Time: 15 mins
- Cook Time: 24 hours
- Total Time: 24 hours 15 mins
- Category: Soup
Ingredients
Scale
- 2 lbs (1 kg) marrow bones or other animal bones
- 1 peeled, roughly chopped yellow onion
- 2 roughly chopped carrots
- 2 roughly chopped celery stalks
- 2 tablespoons apple cider vinegar
- 2 chicken feet for extra gelatin (optional)
Optional Ingredients
- Bunch of parsley
- 1 teaspoon peppercorns
- 1 tablespoon salt
- 2 peeled garlic cloves
- Any other herbs or spices
Instructions
- Roast the bones at 375 degrees F (180 degrees C) for 20 minutes before you begin (optional but recommended unless you’re using poultry or fish bones which don’t need it).
- Put the bones in your crockpot.
- Add a roughly chopped onion, a couple carrots, celery, vinegar and, if you want, chicken feet.
- Add some garlic cloves too if you want, or additional spices.
- Pour water over the bones, so it reaches an inch (2.5 cm) over them and turn the crockpot on to high.
- After half an hour, turn it down to low.
- Cook beef, pork or other red meat broth for 48 hours, poultry broth for 24 hours or fish broth for 8 hours.
- Skim off any impurities rising to the surface with a fine-mesh strainer – every 20 minutes during the first couple hours then less frequently.
- Half an hour before the broth is done, add any fresh herbs you want to use.
- Sieve it through a fine-mesh sieve.
- Some people omit this step but I usually choose to sieve it for a clearer result.
- Refrigerate in a sealed container for up to 5 days or freeze for up to 6 months.
Notes
- If you want to make an Asian bone broth, add green onions (spring onions), fresh ginger and garlic cloves instead of the other ingredients. Remove them before serving the bone broth.
- You can use a bouquet garni bag or cheesecloth or string to tie your ingredients together, then simply remove it, else you can sieve your broth before serving.
- If you want to remove the fat, put the broth in the refrigerator overnight, then the next day you can remove the white layer sitting on top (that is pure fat). Try this handy fat separator to make easy work of taking the fat off without having to chill the broth overnight.
