Easy Diabetic Chili Recipe
This post contains affiliate links. As an Amazon Associate I earn from qualifying purchases.
This easy diabetic chili recipe is one of the meals I started making after my ex-husband was diagnosed with type 2 diabetes. I wanted a hearty chili con carne that didn’t rely on sugar or a large quantity of beans, and I wanted it to taste very similar to the chili we already enjoyed.
The chili has ground beef, tomatoes, onion, garlic, cumin and oregano. It cooks in the slow cooker, so it’s a good one to start earlier in the day if you want a warming dinner in the evening. I often make enough for lunch the following day too.
It’s important to say that no single recipe works for everyone with diabetes. The tortilla, toppings, portion size and any changes you make will affect the carbohydrate content. Check the labels on your ingredients and follow the eating plan recommended by your doctor or registered dietitian.
Easy Diabetic Chili Recipe at a Glance
- Prep time: 15 minutes
- Cook time: 4 hours 15 minutes
- Total time: 4 hours 30 minutes
- Servings: 4
- Cuisine: Tex-Mex
- Main ingredients: Ground beef, tomatoes, onion, garlic and spices
- Best cooking method: Slow cooker
- Storage: Refrigerate the chili for up to 3 days or freeze it for up to 3 months
Why You’ll Love This Slow Cooker Chili
- Most of the cooking is hands-off: Brown the beef, onion and garlic, add everything to the slow cooker and leave it to cook. I used to make this recipe in the morning when I worked from home and smell delicious aromas all day long!
- You control the heat: Add chili powder or hot sauce according to your taste. Put extra hot sauce on the table for anyone who likes a hotter serving.
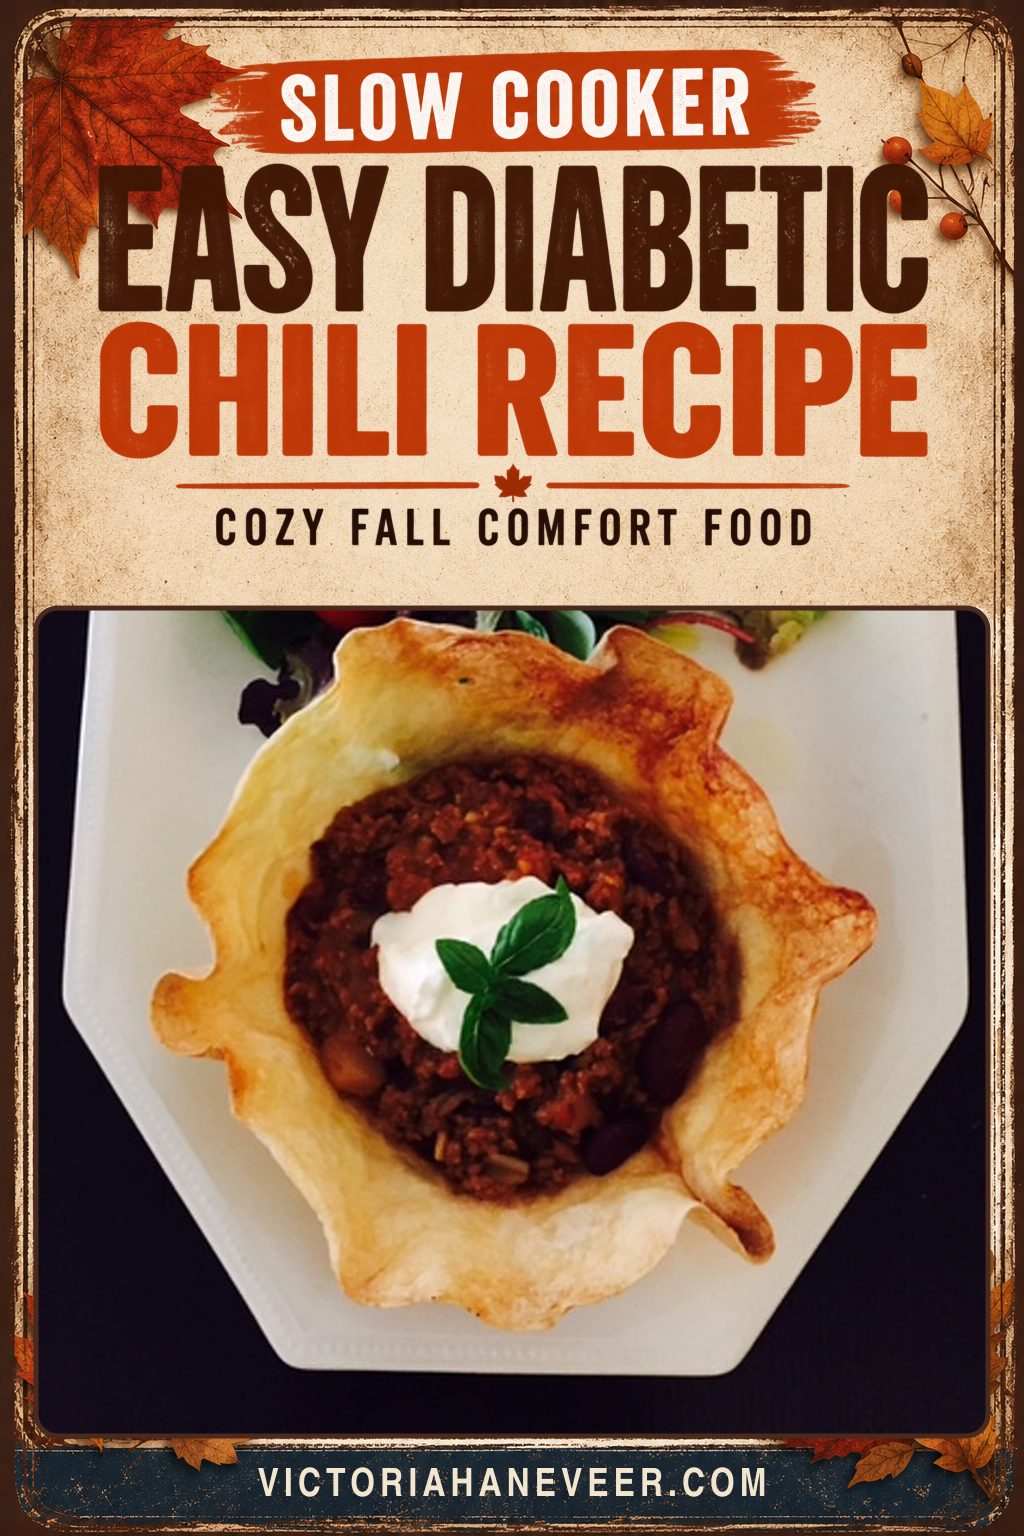
- The serving options are flexible: You might like to use the crisp tortilla bowls shown here or serve the chili in ordinary bowls with salad or nonstarchy veggies.
- It’s good for batch cooking: The chili can be made ahead, refrigerated or frozen without the tortilla bowls and fresh toppings.
Ingredient Notes
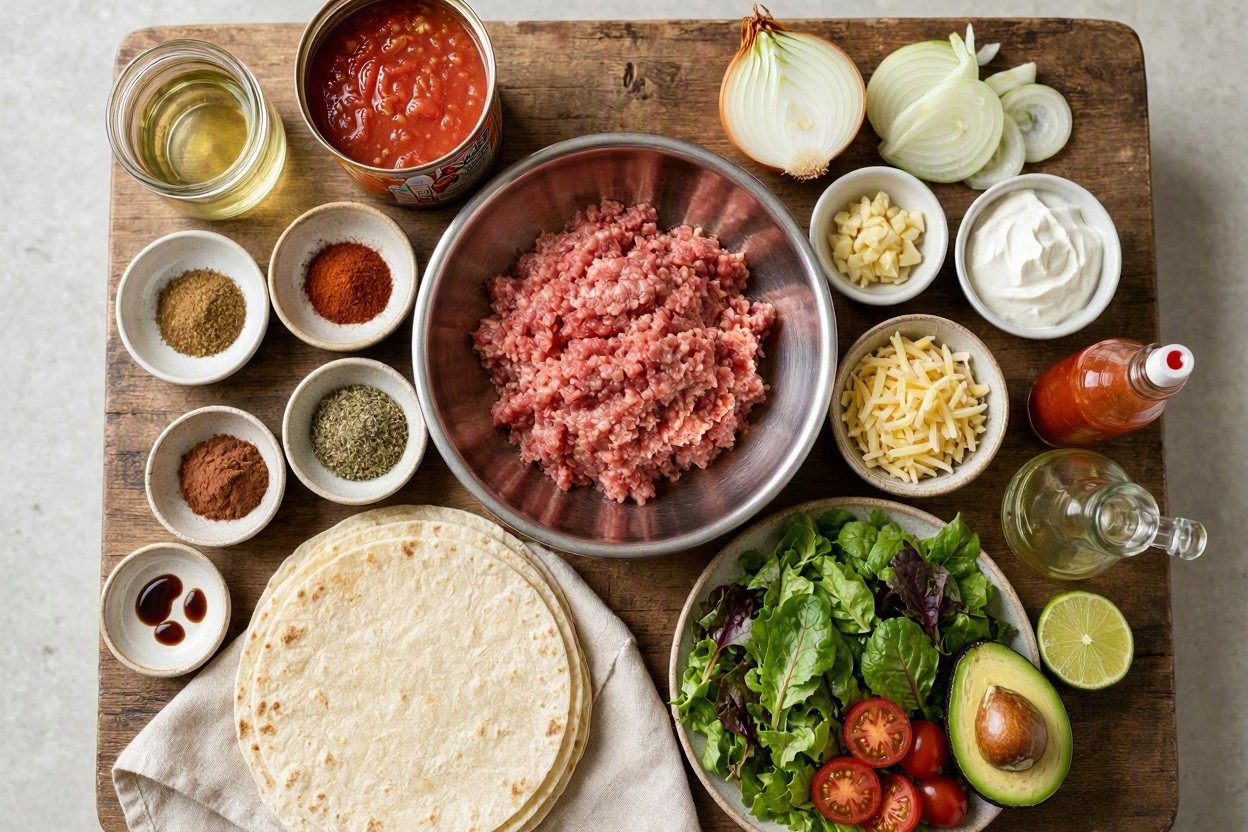
- Ground beef: I use 1 pound (450g) of ground beef. Choose the fat percentage that suits your preferences and drain excess fat after browning if needed. Personally I like to use 80/20 or lean ground beef (beef mince) in mine. Sometimes 70/30. It’s up to you but I probably wouldn’t go for 90/10 (extra-lean) because it has much less flavor and a good chili should be all about the beef! It’s optional whether or not you drain the excess grease off your beef after browning. If you’re using fatty beef, you’ll probably want to. If using lean, you might or might not.
- Tomatoes in juice: Check the label and choose tomatoes without added sugar.
- Onion and garlic: These form the base of the chili. I like to chop the onion fairly small, as large chunks may not get fully tender during cooking.
- Cumin and oregano: Cumin adds the familiar earthy chili flavor while oregano adds a little herbal flavor.
- Chili powder or hot sauce: Brands vary in heat, salt and sugar, so add a small amount first and check the label if you are tracking carbohydrates or sodium.
- Worcestershire sauce: This is optional. A splash adds extra depth, although some brands contain a small amount of sugar.
- Unsweetened cocoa powder: A small amount is optional. I like to add a pinch because it deepens the flavor without making the chili taste like chocolate (if it does, you’ve used too much!)
- Low-carb tortillas: Brands differ considerably, so use the nutrition label to choose one that suits your own eating plan.
How to Make Diabetic Chili in a Slow Cooker
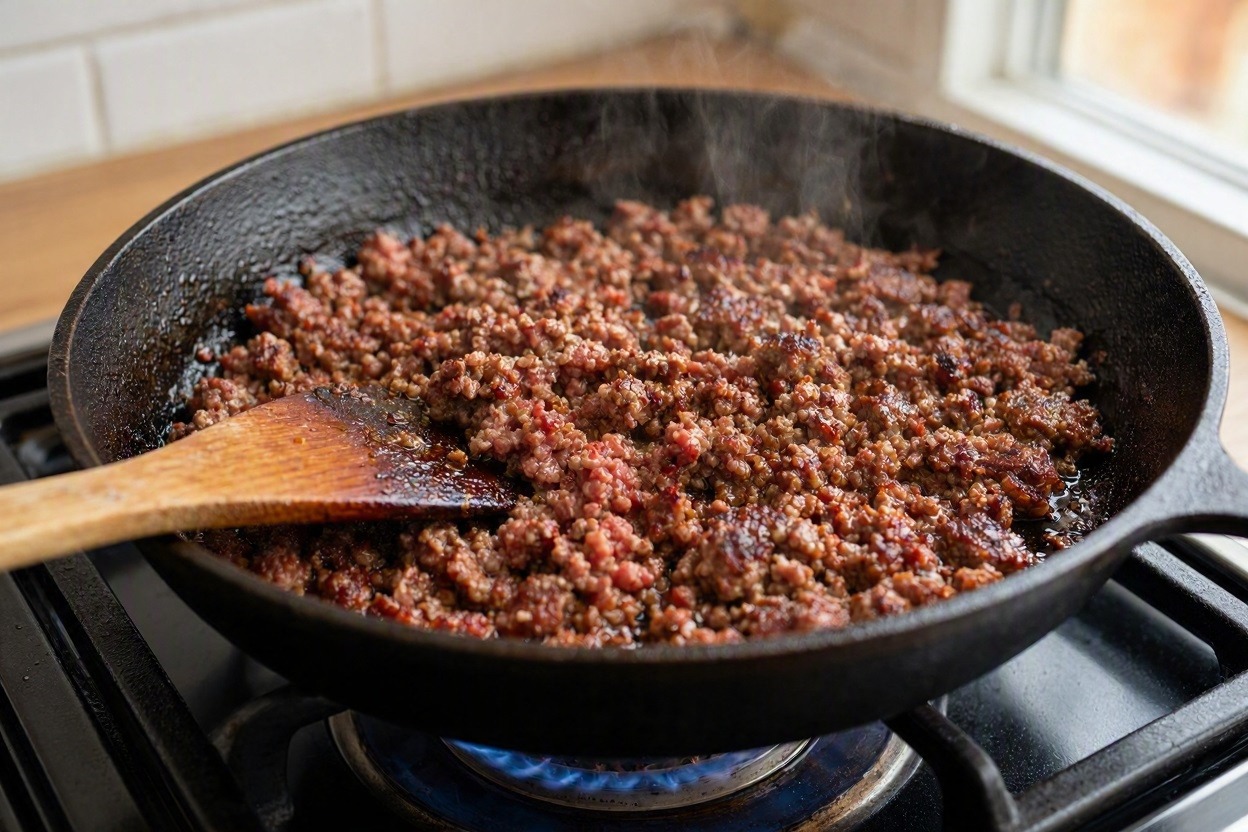
Brown the ground beef with the onion and garlic before adding it to the slow cooker. This cooks the meat safely, softens the onion and gives the chili a better flavor than throwing everything in raw.
Stir in the tomatoes, cumin, oregano and your chosen seasonings. Cook the chili on HIGH for 4 hours or LOW for 8 hours. I like to make the tortilla bowls shortly before serving so they stay crisp.
Is Chili Good for Diabetics?
The majority of people with diabetes can eat chili, although the recipe and serving size need to fit their individual meal plan. Ground beef contributes protein, while the tomatoes, onion, tortilla and any beans or toppings contribute varying amounts of carbohydrate.
The CDC’s diabetes plate method recommends filling half the plate with nonstarchy vegetables, one quarter with lean protein and one quarter with carbs. Serving this chili with a generous salad can help you build the meal around that general framework.
Carbohydrate needs differ from one person to another. The American Diabetes Association’s carb-counting guidance explains why consistent portions and label checking can be important, especially for people who use insulin or certain diabetes medications.
How to Make Crisp Tortilla Bowls
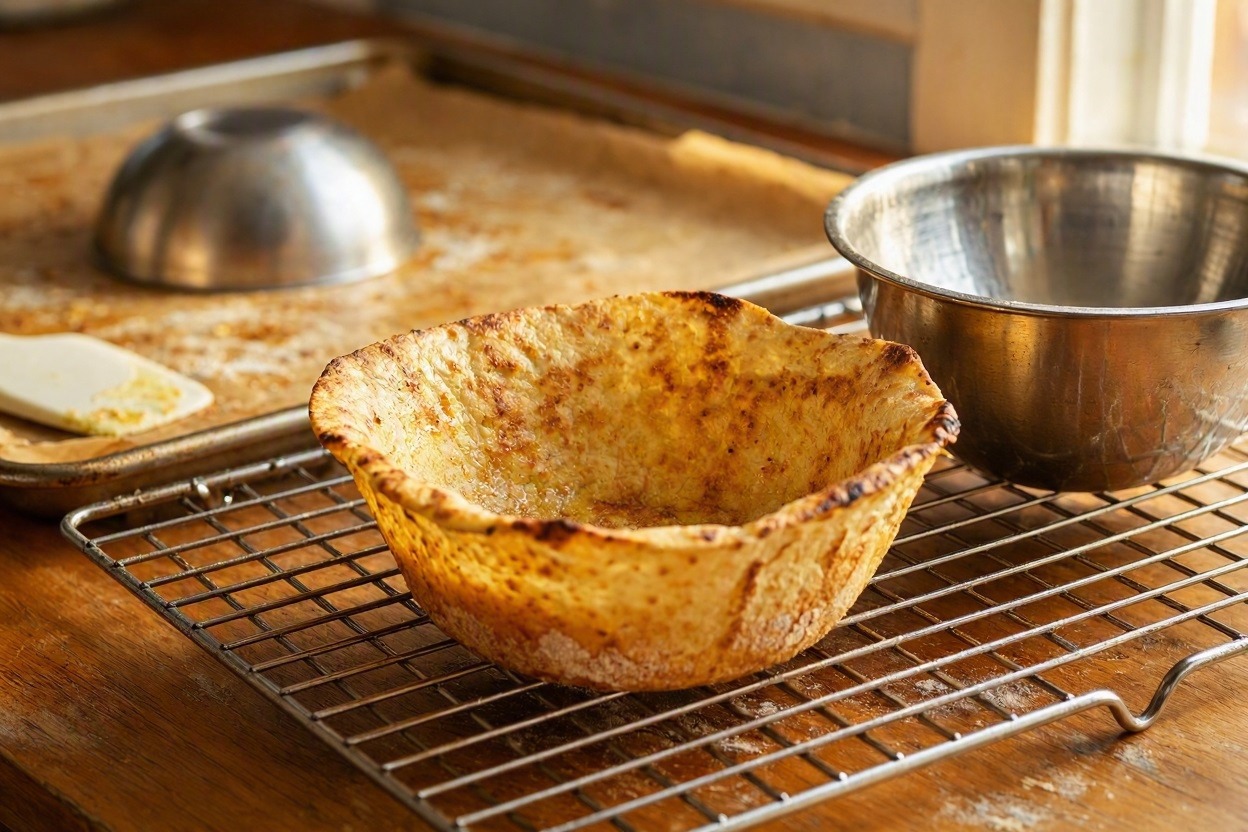
Spray both sides of each tortilla with nonstick cooking spray, then drape it over an upside-down oven-safe bowl or tortilla bowl mold. Bake at 400°F (200°C) for about 10 minutes, or until the tortilla is crisp and holds its shape.
Let the shells cool for a few minutes before lifting them from the molds. Fill them immediately before serving. You can also cut the tortillas into wedges, bake them until crisp and serve them beside the chili.
Equipment
- 3-quart slow cooker – you can use a larger one if you have it or a smaller one as long as you have an inch or so headroom, for even cooking.
- Large skillet with lid – worth investing in a good one if you’re like me and use yours a lot!
- Metal tortilla bowl molds – you don’t have to make crispy tortilla bowls but I like to.
- Silicone ladle – another kitchen staple!
- Wooden spoon or silicone spatula
- Measuring cups and spoons
Substitutions and Variations
- Use ground turkey: Replace the beef with the same weight of ground turkey and brown it before adding to the Crockpot. I don’t mind a diabetic turkey chili but, for me, the best has to be beef!
- Add beans: Beans add carbohydrate and fiber. Drain and rinse them, then include the amount in your carbohydrate calculation if you add them.
- Skip the tortilla bowl: Serve the chili in a regular bowl with salad or cooked nonstarchy veg.
- Make it hotter: Add more chili powder or hot sauce, checking bottled sauce for added sugar if that is relevant to your eating plan.
- Add more veggies: Chopped bell pepper, mushrooms or zucchini can be cooked with the onion. They’ll change the final volume and consistency.
- Use different toppings: Try shredded cheese, sour cream, avocado, green onions (spring onions) or cilantro (fresh coriander). Portions and nutrition vary by product.
What to Serve with Diabetic Chili
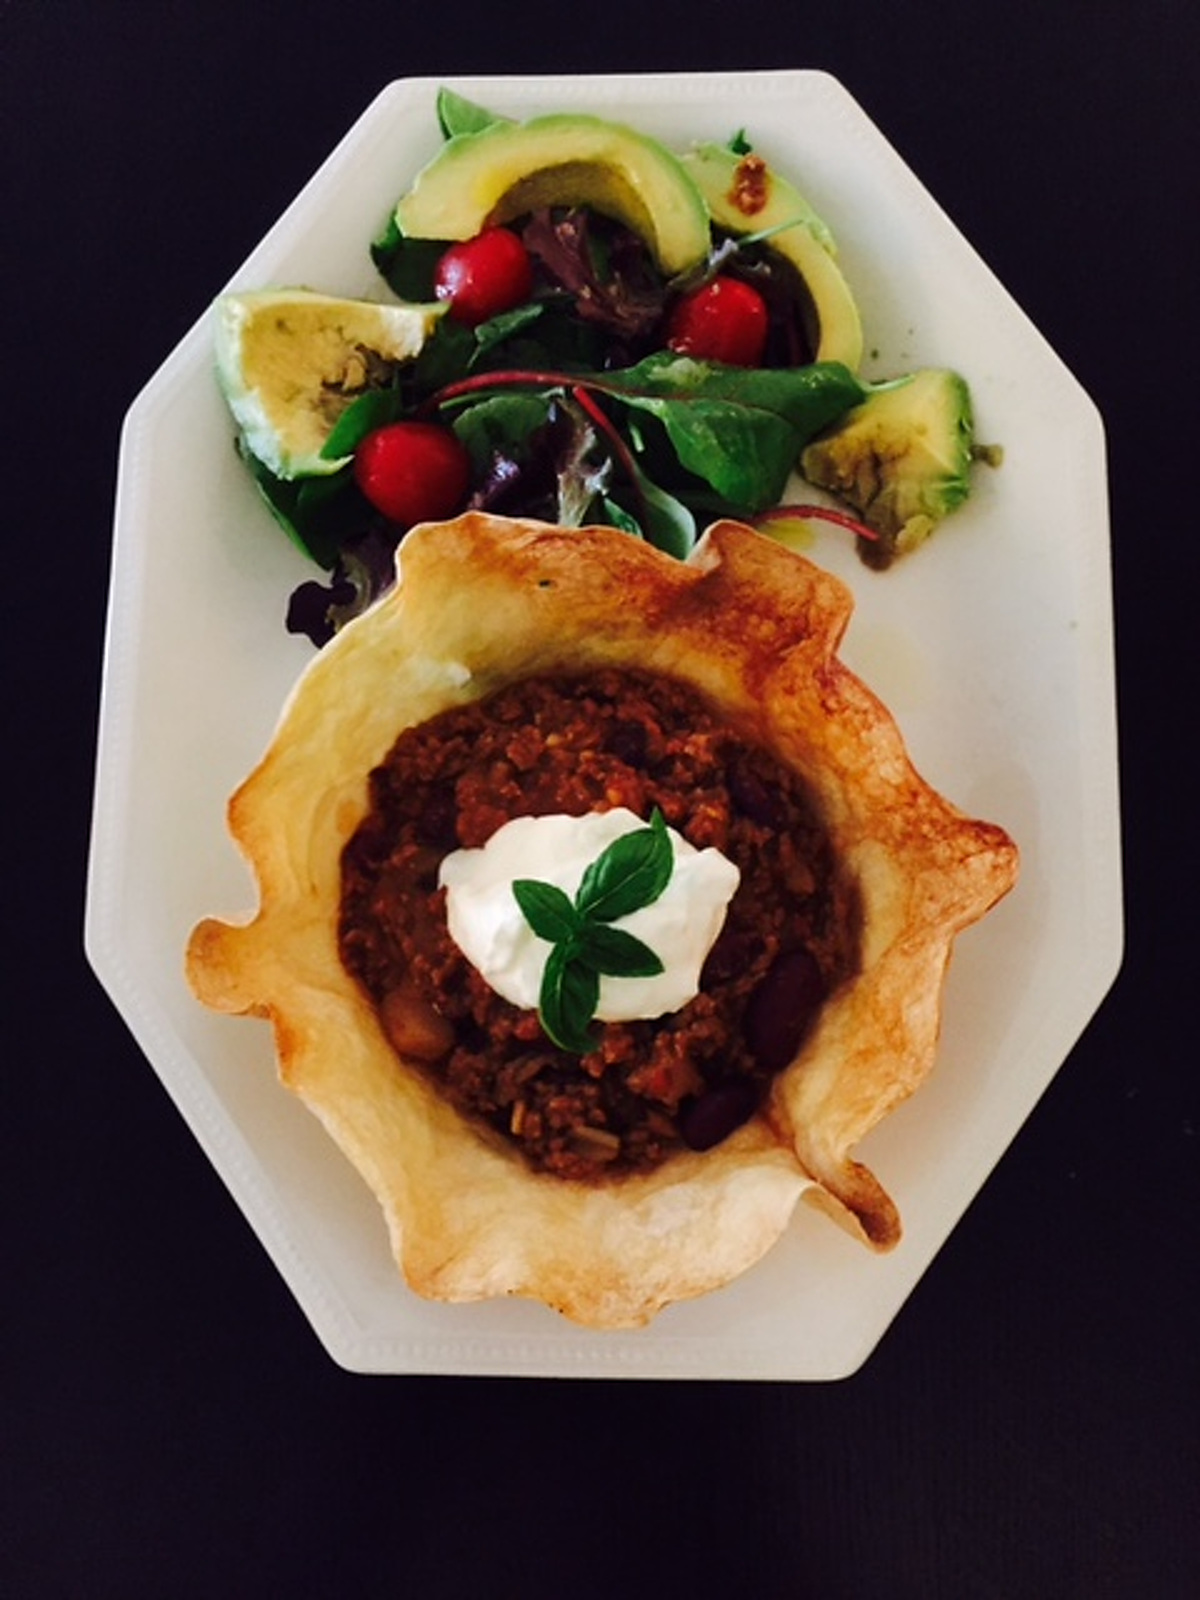
I serve this chili with mixed salad leaves, cherry tomatoes and avocado dressed with lime juice and extra-virgin olive oil. You can leave out the tortilla bowl and add more salad if you prefer. My Mexican street corn is another option for people who aren’t limiting carbs.
Put the toppings in small bowls so everyone can choose their own. This also makes it easier for each person to keep track of what’s been added to their serving.
How to Store
- Make ahead: Cook the chili up to 2 days before serving. Keep it covered in the refrigerator and make the tortilla bowls and salad on the day you serve it.
- Refrigerator: Cool the chili promptly and refrigerate it in a covered container for up to 3 days. Store the salad, toppings and tortilla bowls separately.
- Reheating: Reheat the chili on the stovetop over medium-low heat, stirring occasionally, until piping hot throughout. You can also reheat individual portions in the microwave.
- Freezing: Freeze the cooled chili without the tortilla bowls, salad or toppings for up to 3 months. Thaw it overnight in the refrigerator before reheating.
Easy Diabetic Chili Recipe FAQs
The chili itself is bean-free and made without added sugar, although keto suitability depends on the brands, toppings, tortilla and serving size you use. Check the nutrition labels and calculate the complete serving according to your own targets.
Yes. Cook it on LOW for 8 hours instead of HIGH for 4 hours. Brown the beef, onion and garlic first in either case.
A Warming Chili for Cooler Evenings
This slow cooker chili is easy to prepare in the morning and makes a warming fall dinner. Keep the base recipe bean-free, choose the tortilla and toppings that fit your meal plan and serve it with plenty of salad.
If you’re in the mood for more chili ideas, have a look at my collection of 30 easy chili recipes. My chicken fajitas and air fryer quesadilla are also easy Tex-Mex dinners.
Easy Diabetic Chili Recipe
Ingredients
- 1 pound (450g) ground beef
- 1 yellow onion, chopped
- 1 or 2 garlic cloves, minced
- 1 tablespoon olive oil
- 1 14- ounce (400g) can tomatoes in juice
- ½ teaspoon ground cumin
- Chili powder and/or hot sauce, to taste
- ½ teaspoon dried oregano
- Salt and black pepper, to taste
- Splash of Worcestershire sauce, optional
- ¼ teaspoon unsweetened cocoa powder, optional
- 4 low-carb tortillas
- Nonstick cooking spray
- 1 small bag mixed salad leaves
- 8 cherry tomatoes, halved
- 1 avocado, sliced
- Lime juice, to taste
- Extra-virgin olive oil, to taste
- Shredded cheese
- Sour cream
- Hot sauce
- Fresh basil or cilantro (fresh coriander)
Equipment
- 3-quart slow cooker
- Large skillet
- Wooden spoon or silicone spatula
- Measuring Cups and Spoons
- Oven-safe bowls or tortilla bowl molds
- Baking sheet
- Large salad bowl
- Soup ladle
Method
- Heat the olive oil in a large skillet over medium heat.
- Add the ground beef, onion and garlic. Cook, breaking up the beef with a wooden spoon, until the beef is browned and no pink remains. Drain excess fat if needed.
- Stir in the tomatoes, cumin, chili powder and/or hot sauce, oregano, salt, black pepper and the optional Worcestershire sauce and cocoa powder.
- Transfer the mixture to the slow cooker. Cover and cook on HIGH for 4 hours or LOW for 8 hours.
- Heat the oven to 400°F (200°C) shortly before the chili finishes cooking.
- Spray both sides of the tortillas with nonstick cooking spray. Drape each tortilla over an upside-down oven-safe bowl or tortilla bowl mold set on a baking sheet.
- Bake the tortillas for about 10 minutes, or until crisp and rigid. Let them cool for a few minutes before removing them from the bowls or molds.
- Add the salad leaves, cherry tomatoes and avocado to a large bowl. Dress with lime juice and extra-virgin olive oil, then toss gently.
- Add one tortilla bowl to each plate and ladle in the hot chili. Serve the salad on the side and add any chosen toppings.
Notes
- Low-carb tortillas, canned tomatoes, hot sauces and toppings vary in carbohydrate content. Check the labels and calculate the complete serving according to your own eating plan.
- The tortilla bowls are best made shortly before serving. Store leftover chili separately from the bowls, salad and toppings.
- Refrigerate leftover chili in a covered container for up to 3 days or freeze it for up to 3 months.